 Loading... Please wait...
Free Shipping on orders over $500
Categories
How to Take Vital Signs – Step-by-Step Manual Instructions
Posted on 10/04/2018 11:40:05

One of the very first practical skills that students of the medical sciences learn is how to take vital signs. Measuring vital signs is important: This information shows healthcare practitioners how the body is functioning and alert to possible medical conditions, many of which are present without signs or symptoms.
The important vital signs to monitor in patients are:
- Heart Rate (Pulse)
- Respiration Rate
- Body Temperature
- Blood Pressure
Why is it so important to know how to take vital signs? What sort of data is gathered during the vital signs process and what does this tell us about the patient? How do healthcare professionals collect vital signs and ensure accuracy? We can answer these questions by taking a look at each of these measurements and learning the processes by which they are collected and documented. We also discuss the monitoring equipment used and provide the numerical ranges that are considered normal in the adult population.
What are Vital Signs?
Vital signs, or vitals for short, are measurements of the inner workings of the human body. They are collected and recorded over time, giving providers information on how vital organs, such as the heart and lungs, are functioning. Vital signs can alert providers to medical problems, and these measurements are tracked throughout the patient journey, from pediatrics to acute care to home health.
The four main vital signs that are routinely taken by healthcare professionals are heart rate (also known as pulse), respiration rate, body temperature, and blood pressure. Vital signs can be taken with nothing more than a few basic pieces of equipment, or by using one of the many vital sign monitors available. Let’s take a look at each of these measurements and the processes by which they are collected and documented, including the numerical ranges that are considered normal in the adult population.
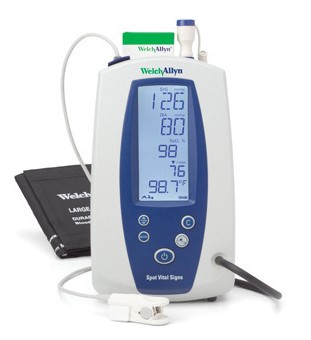
How to Take Vital Signs - Step-by-Step Instructions:
Let’s define and outline the step-by-step processes that healthcare professionals – such as emergency medical technicians (EMTs), certified nursing assistants (CNAs) and registered nurses – adhere to when taking vital signs in a medical setting. Vitals are taken in situations ranging from the roadside scene of an accident to remote at-home monitoring, and everywhere in between. As such, healthcare providers need to know how to take vital signs quickly and correctly.
Heart Rate (Pulse)
Heart rate, or pulse, is the number of times a heart beats per minute (bpm). Heart rates vary by person, and a normal pulse can range between 60 to 100 beats per minute. An individual’s heart rate can fluctuate considerably due to fitness level, illness, injury, emotional state— even the temperature of the room can affect heart rate. Highly trained athletes, for example, may have a normal resting heart rate closer to 40 beats per minute, and this is still considered acceptable.
With some exceptions, patients with vitals outside of the 60 to 100 beats per minute range will very likely be sent for additional testing. Especially if these patients have other symptoms such as dizziness or shortness of breath. Most often, an investigation into the heart starts with an electrocardiogram, or EKG, a relatively simple cardiac measurement tool.
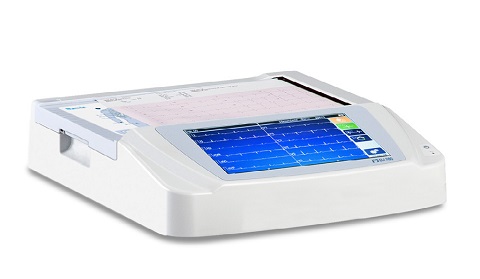
Many cardiac patients are asked by their doctor to record their pulse daily, and some people measure heart rate regularly as part of an exercise program.
To take heart rate:
1.Wash your hands.
2.Make sure that individual is at rest before you begin.
3.The easiest place to find a pulse to measure is the radial artery found on the inside of the wrist closest to the thumb. Alternatively, you can find the pulse on the inside of the elbow (brachial artery), behind the knee (popliteal artery) or neck (carotid artery).
4.Use first and second fingertips (never the thumb) to press firmly but gently on the wrist (or otherwise) until you feel a pulse.
5.With an analog clock or watch, wait until the second hand is on the 12.
6.Begin counting the beats of the pulse.
7.Count pulse for 60 seconds until the second-hand returns to the 12 (you may also count for 15 seconds and multiply by 4 to calculate beats per minute).
8.When counting, do not watch the clock continuously, but concentrate on the beats of the pulse.
Respiration Rate
Respiration rate, sometimes referred to as breathing rate, is the number of breaths taken per minute. This measurement is always taken when the individual is at rest. A single respiration count is equal to the chest rising (inhalation) and falling (exhalation) once. The normal range for an adult is 12 to 28 respirations per minute.
To take respiration rate:
1.Wash your hands.
2.Place your fingers on the individual’s wrist (either side).
3.Count breaths (inhale + exhale = 1 respiration) for one minute.
4.Document respiration rate, noting any observations (such as wheezing).
Factors like fever, agitation, illness, age, and even sleep can have an effect on breathing and therefore the respiratory rate. Respiratory rate fluctuations are often seen as an early warning sign for acutely-ill hospital patients, and it is closely monitored within acute care settings.
Body Temperature
Put simply, body temperature is the amount of heat in the body. Core body temperature is controlled by a process called thermoregulation. No individual has the exact same temperature reading throughout the day as body temperature naturally fluctuates.
Temperature is considered normal at 98.6 degrees F (37 degrees C), although anything between 97.6 degrees F (36.4 degrees C) to 99.6 degrees F (37.5 degrees C) is acceptable. A temperature over 100.4 degrees F (38 degrees C) indicates a fever caused by illness or injury. Hypothermia (low temperature) occurs when the body temperature dips below 95 degrees F (35 degrees C).
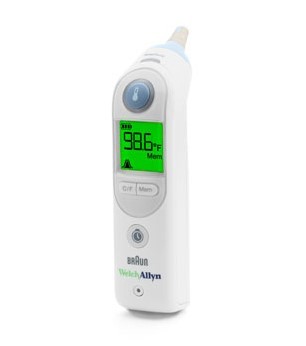
Thermometers are the tools we use to collect body temperature, and there are multiple options available to healthcare providers, such as glass thermometers, digital thermometers, tympanic (ear) thermometers, and rectal thermometers. Your thermometer of choice will ultimately depend on the needs of your organization. Although healthcare practitioners must know how to work with all types, today we most commonly use digital thermometers.
To take body temperature using a digital thermometer:
1.Wash your hands.
2.Cover thermometer mouth tip with a clean plastic shield (or clean before and after use for glass).
3.Press button to set the thermometer.
4.Place thermometer under tongue and instruct individual to close mouth.
5.Wait several minutes, remove thermometer when beeping indicates the reading is complete.
6.Document temperature, including the date, time and method used as follows: “O” for oral, “R” for rectal, “E” for ear, “A” for axillary.
7.Clean and sterilize the thermometer.
Note: Oral thermometers are not indicated for some individuals, such as those with a history of seizures. Digital thermometers can be used to take an axillary temperature by being placed under the armpit, against dry skin, for five minutes.
Blood Pressure
Blood pressure is a reading of how effectively the oxygenating blood is moving through the blood vessels of the circulatory system. Blood pressure is expressed in two parts: systolic pressure (the pressure created when the blood pumps from the heart into the arteries) over diastolic pressure (the pressure inside the artery as the heart rests between beats). This is a measurement with two numbers, recorded as mm Hg (millimeters of mercury) and written as systolic/diastolic.
For adults, the systolic pressure should be less than 130 and the diastolic pressure should be less than 85. For this example, the measurement would be written as 130/85. Low blood pressure is called hypotension and high blood pressure is called hypertension.
Instruments used to take blood pressure include a stethoscope, blood pressure cuff with inflatable balloon (sphygmomanometer), and numbered pressure gauge called a digital monitor or aneroid monitor.
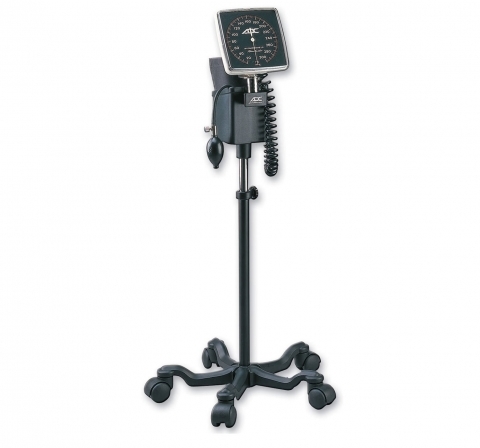
To take blood pressure using a stethoscope, cuff and aneroid monitor:
1.Wash your hands.
2.Disinfect stethoscope earpieces and diaphragm (round disk).
3.Check to make sure that the blood pressure monitor is in good working order.
4.Place fingers on the underside of the elbow to locate pulse (called the brachial pulse).
5.Wrap and fasten deflated cuff snugly around the upper arm at least one inch above where you felt the strong and steady brachial pulse.
6.Insert stethoscope earpieces and position diaphragm directly over the brachial pulse.
7.Turn the knob on the air pump clockwise to close the valve.
8.Pump air, inflating the arm cuff until the dial pointer reaches 170.
9.Gently turn the knob on the air pump counter-clockwise to open the valve and deflate the cuff.
10.As the dial pointer falls, watch the number and listen for a thumping sound.
11.Note the number shown where the first thump is heard (systolic pressure).
12.Note the number shown where the last thump is heard (diastolic pressure).
13.Deflate and remove cuff.
14.Document the reading, written as systolic/diastolic, and note any unusual observations.
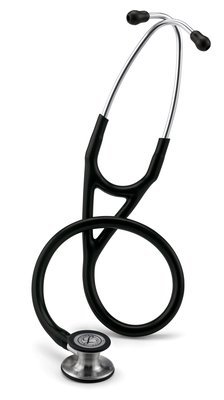
Blood pressure is considered to be the most difficult of the vital signs to learn how to measure. Interestingly enough, blood pressure is not even technically a vital sign, though it is always measured alongside other vital signs. With understanding, practice, and some help from medical equipment like vital sign monitors, anyone can learn to learn to take blood pressure measurements.

Measuring Vital Signs
Vital signs serve as a communicator of patient status and are used to monitor acute to chronic disease, and everything in between. Vital signs should be taken when the individual is at rest and hasn’t eaten, drank, smoked or exercised within the last 30 minutes.
To recap, normal vital sign ranges for average healthy adults (at rest) are:
- Blood pressure: 90/60 mm Hg to 120/80 mm Hg
- Breathing: 12 to 18 breaths per minute
- Pulse: 60 to 100 beats per minute
- Temperature: 97.8°F to 99.1°F (36.5°C to 37.3°C)/average 98.6°F (37°C)
Among infants, children and the elderly, the methods and tools for measuring vital signs do not change in any significant way. The normal range values for pulse, respiration rate, and blood pressure vary among children depending on the age of the child. Body temperature is the one vital sign that does not change depending on age. Vitals sign values do not change among the elderly (values should fall within the range considered normal for adults), although occasionally vitals may be a bit more difficult to measure accurately in older adults.
For the most accurate readings, it is best that the person not smoke, drink coffee, or exercise vigorously within 30 minutes before taking vitals. Don’t be shy about taking multiple readings a few minutes apart – be sure to write down all of the results. And don’t forget to record the date and time along with any other important details. Vital signs are written using the LOINC internationally accepted standard coding system – take care to record vital signs using the correct and consistent format.
Always wash your hands before and after engaging with an individual to take vital signs. As well, ensure that all supplies are cleaned and sanitized per manufacturer instructions and stored away in the proper place. By following these instructions and practicing carefully, you’ll be able to read vital signs just like a pro.
USA Medical and Surgical Supplies provides a complete range of stethoscopes, vital signs monitors, and other diagnostic equipment at low prices. For more information, or to ask any questions about finding the right medical equipment for your organization, please call our toll-free number: 1-866-561-2380 or Email Us.


