
Portable digital colposcope service for cervical imaging
11/06/2026 05:17:09
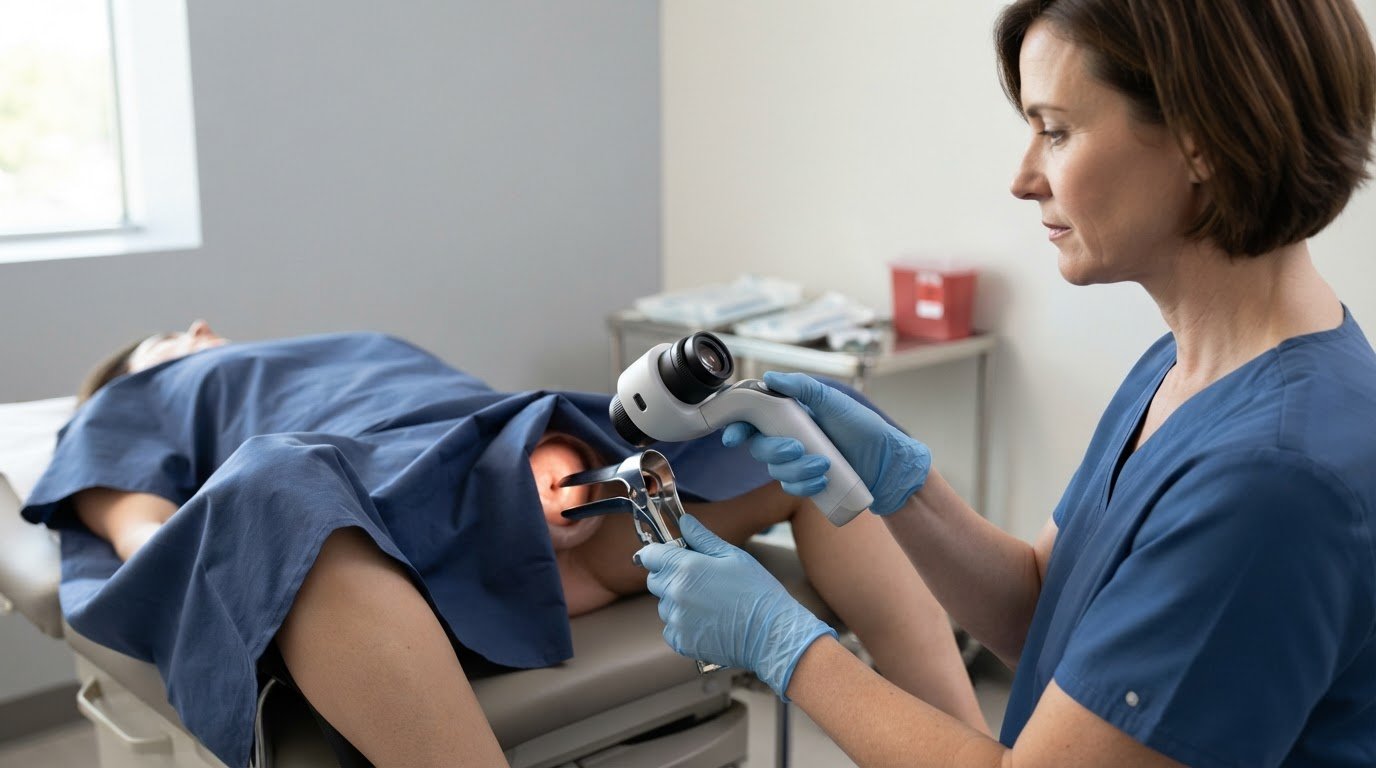
A clear cervical image is useful only when its intended clinical role is clear. A portable colposcope with digital camera captures magnified images of cervical tissue for clinical documentation and review, helping clinicians assess abnormalities and select areas for biopsy. Image capture describes what the device does; it doesn't, by itself, answer whether a particular device has regulatory approval.
Approval is a separate question from a device’s imaging features. This guide explains how a portable digital colposcope captures and documents cervical images, how those images may support clinical assessment, and why regulatory status depends on the device’s intended use.
You’ll learn how image capture works, how clinicians use documented views during assessment, and which design features shape a colposcope’s role. The goal is to understand the technology and its limits, so you can distinguish image documentation from diagnosis and evaluate equipment against its intended clinical use.
Key Takeaways
- Understand how a colposcope provides magnified cervical views during an examination through a speculum.
- Learn how acetic acid, Lugol’s iodine, and green light can support image capture of different tissue appearances.
- See how image documentation can support clinical review and biopsy-area selection without replacing clinical judgment.
- Identify the practical role of focus, illumination, and portability when considering digital colposcope design.
- Explore how USA Medical and Surgical Supplies’ colposcope offering fits equipment needs for cervical imaging.
Magnified cervical imaging through a speculum
A speculum provides a view of the cervix, while a colposcope magnifies tissue detail for the clinician. Digital imaging adds the ability to capture and review that view.
High-Definition Magnification
During an examination, the clinician positions the colposcope to view the cervix through the speculum. Magnification makes visible tissue features easier to inspect than an unaided view. For a digital colposcope, optical zoom of 20-30 times is a recommended range. Optical zoom enlarges the image through the camera’s optics, rather than relying only on enlarging pixels on a screen.
This distinction matters when evaluating a magnified image. Digital enlargement makes an image look bigger, but cannot add detail the camera did not record. The cervix also needs to be clearly framed and in focus. A tilted view or partial obstruction by the speculum can limit what the image shows, regardless of the zoom level.
High-definition imaging describes the camera’s ability to record fine visual detail. Consider it alongside magnification, not as a substitute. Zoom brings cervical tissue closer, while camera resolution affects how clearly the view is recorded. The goal is an image that shows the area of interest at a useful scale, not simply a larger image.
Digital Camera Imaging
A digital colposcope uses a camera to capture the magnified cervical view as an image. About 2 million pixels is a recommended camera resolution. The pixel count describes image dimensions, but it does not by itself establish that every captured image will be clear. Focus, lighting, positioning, and the field of view all affect the result.
For consistent imaging, follow a straightforward sequence: position the instrument, bring the cervix into view, adjust focus, then capture the image. The screen preview can reveal blur or an area cut off at the edge before the image is saved. This links the live examination to a digital record for later review.
- Field of view: Keep the relevant cervical area visible within the image.
- Focus: Confirm that tissue features appear defined, not blurred.
- Magnification: Select a view that shows detail without cropping out useful context.
- Capture: Save images that accurately represent the view through the speculum.
These checks help distinguish image size from image usefulness. A high-resolution camera and optical zoom can support magnified documentation, while careful positioning helps keep the image interpretable. The image supports examination and review; it does not replace clinical assessment.
Image capture with acetic acid, Lugol’s iodine, and green light
Digital colposcopy can capture cervical images after applying acetic acid or Lugol’s iodine, and with green light imaging. These views document tissue appearance under different examination conditions. The clinician chooses which views to capture based on the examination and intended review.
Yes, a portable digital colposcope can capture images for sharing and remote review or a second opinion. With EMR integration, images can be uploaded directly to patient files. Secure storage and sharing depend on the connected system’s access controls and information-handling practices, not image capture alone.
Acetic acid, Lugol’s iodine, and green light are distinct imaging conditions, so label each view clearly in the clinical record. A practical sequence is to capture the image, note the examination condition, then save it with the relevant patient documentation. Clear labels distinguish views taken after acetic acid from those captured with Lugol’s iodine or green light.
Focus and framing determine whether an image shows the area of interest. Before capture, bring the cervix into view, adjust focus, and check that the tissue is centered. If the camera rotates, adjust its position to improve framing, then inspect the preview before saving. Rotation can help with composition, but cannot correct blur or an obstructed view.
Still images and video serve different documentation purposes. A still records one selected view for later review; video records a moving sequence that may show how the clinician changes the view during examination. Digital colposcopes can capture images, while video capture depends on the device’s documented functions. Don’t assume a camera that saves still images also records video.
When evaluating equipment, consider the complete image workflow, not just the camera. Check how the system captures, transfers, stores, and shares images in the clinical setting. For example, an image for a second opinion needs an appropriate transfer route and clear context about its capture condition. An image uploaded to an EMR should remain associated with the correct patient file.
- Acetic acid: Capture and label the view under this examination condition.
- Lugol’s iodine: Keep its images distinct from other captured views.
- Green light: Identify images captured with this illumination mode.
- Review: Confirm focus, framing, and documentation before sharing.
A portable colposcope with digital camera supports image documentation when its capture steps and file workflow fit clinical needs. Consider the image separately from the system that stores or shares it; both affect how the record can be reviewed.
Digital colposcopes can reduce time required for setup, examination, and image upload by up to 50%.
Autofocus and LED illumination
Focus and light work together during a cervical examination. Autofocus adjusts camera sharpness as viewing distance changes, while illumination helps make tissue visible. An image can still be unclear if the cervix moves, the camera angle shifts, or the light falls unevenly.
Autofocus can reduce repeated manual adjustments as the clinician changes the view, but it does not replace checking the image before capture. If the speculum position or camera distance changes, inspect the screen to confirm the tissue appears sharp. If the image remains blurred, reposition or refocus before saving.
Manual focus gives the clinician direct control over sharpness. Where available, autofocus adjusts focus automatically. The right option depends on the examination workflow and how consistently the image comes into focus. Review how the controls respond as the camera moves from a broader view to a closer view of one area of tissue.
LED illumination lights the examination site. White light supports a standard view, while green light can help show vascular patterns. Lighting should make tissue visible without washing out detail. A bright spot or shadow across the cervix can obscure the area, so check lighting and framing before capture.
A practical image-quality check is simple: position the colposcope, illuminate the field, focus on the target tissue, and review the live image. Adjust the angle or focus if you see glare, blur, or uneven lighting. This can catch problems before documentation rather than during later review.
Light output also matters during continued operation. A digital colposcope’s temperature rise at the illuminated area is recommended to remain below 10 ℃ over 30 minutes of working. This figure concerns the illuminated area during operation; it is not a measure of image brightness. Review the device’s operating information alongside its illumination modes and focus controls.
- Focus: Check sharpness after changing the camera position or view.
- Light: Look for glare, shadows, or washed-out tissue detail.
- Illumination mode: Use the available light setting that suits the view being captured.
- Temperature: Consider the recommended rise at the illuminated area during operation.
Autofocus and LED illumination have different roles: one sharpens the image, the other lights the examination field. Assessing both helps determine whether a digital colposcope provides a clear view before an image is saved.
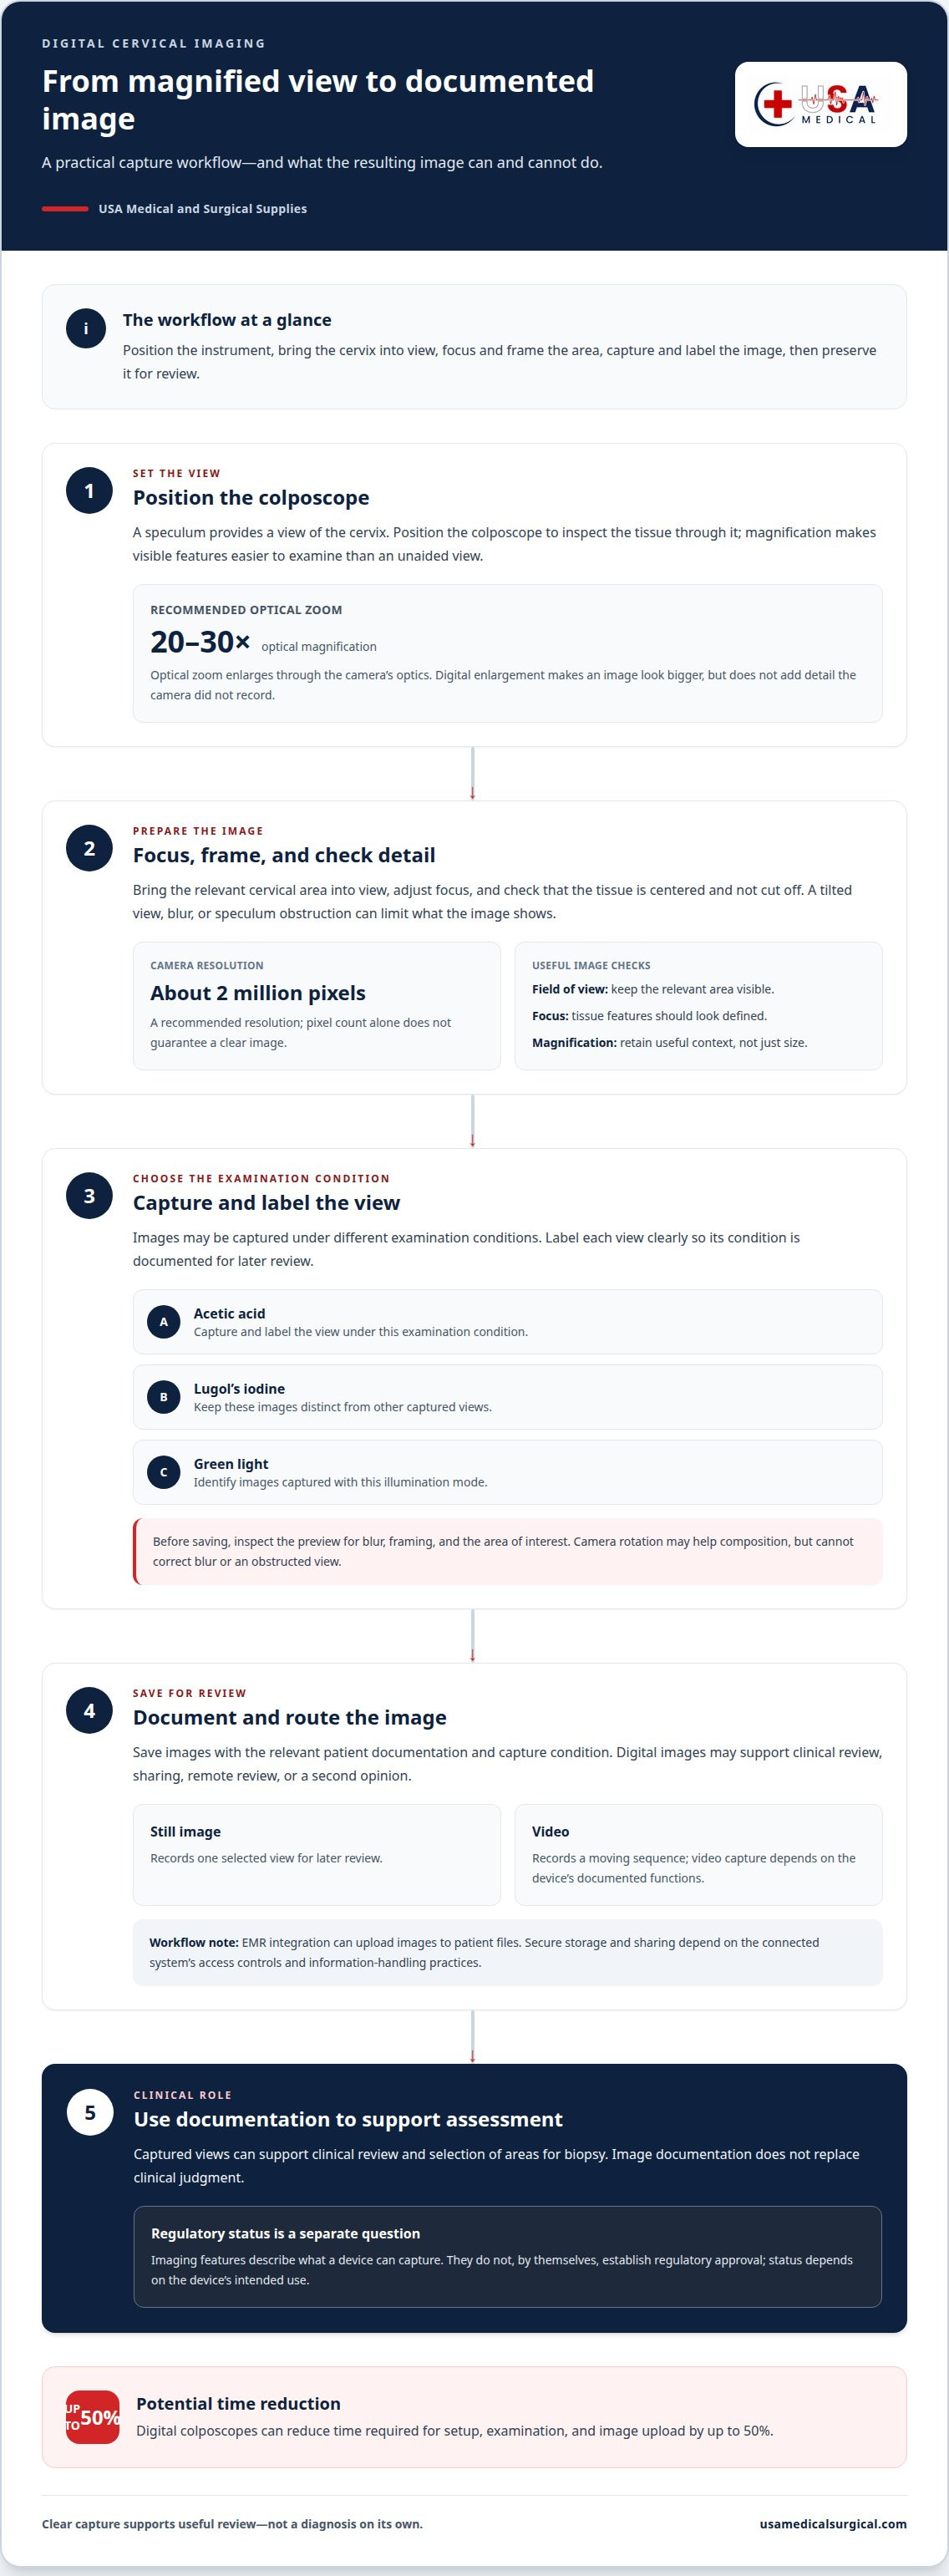
Image documentation for diagnosis and biopsy selection
Clinical images provide a visual record of tissue viewed during colposcopy. They can support assessment of abnormalities and identification of possible biopsy areas, but an image alone does not make a diagnosis. A captured view is most useful when it clearly shows the relevant site and can be interpreted alongside the examination.
Documentation begins with identifying the area of interest and capturing a view that preserves its location and surrounding context. A close-up can show detail, while a broader view helps orient the reader. For example, a close image without the surrounding cervix may be harder to relate to the examination.
After capture, an image can be sent to a smartphone, tablet, or laptop for viewing, depending on the device workflow. Keep it associated with the correct patient record and examination context. A clear label can distinguish a general cervical view from a specific area selected for closer assessment.
Biopsy selection remains a clinical decision. Colposcopic images can document the appearance and location of an abnormal area, supporting the clinician’s assessment. The image does not determine on its own whether a biopsy is needed or which tissue to sample. The clinician considers it as part of the full examination.
A practical documentation sequence keeps each stage distinct:
- Frame the view: Capture the area of interest with enough surrounding tissue to show its location.
- Review the image: Confirm that the view is clear and represents the examination finding.
- Record context: Associate the image with the appropriate patient file and examination details.
- Use in assessment: Consider the documented view when evaluating abnormalities and biopsy areas.
Digital images can also support remote review or a second opinion. For this purpose, the image needs to communicate more than magnified detail. The reviewer benefits from knowing which area is shown and how it relates to the examination. A close crop may show a feature clearly, while a contextual view can clarify its location.
When selecting equipment, consider the full documentation path: capture, review, transfer, and association with the patient file. Images may be sent to a smartphone, tablet, or laptop, but the clinical workflow determines how they are reviewed and recorded. This distinction separates the camera’s role in documenting tissue from the clinician’s role in diagnosis and biopsy selection.
Portable digital colposcope design and intended use
Portability describes a device’s physical design, not a different clinical purpose. A portable digital colposcope is intended to magnify tissues of the vagina, cervix, and external genitalia to aid assessment of abnormalities and selection of biopsy areas. Focus on how the device fits the clinical task and image workflow, not portability alone.
What features should clinicians look for in a portable digital colposcope? Consider its intended use, illumination, zoom options, image capture, and connection to a computing device.
These features describe a particular configuration, not a universal specification for every device. USB power means the colposcope works with a computing device, so portability depends on the complete setup. Consider where the system will be positioned, how images will be viewed, and whether its zoom and illumination modes suit the examination.
What training and maintenance does a portable colposcope require? Clinicians need training in the device’s controls, positioning, focus, image capture, and intended clinical use. Follow the manufacturer’s instructions and local clinical procedures for cleaning, reprocessing, and routine care; the steps depend on the device.
Intended use sets a practical boundary. Magnified images can support assessment and selection of biopsy areas, but they do not replace clinical judgment or establish a diagnosis by themselves. The clinician interprets images within the examination, rather than treating a zoom setting or captured view as a standalone result.
What are the limitations and risks of using a portable digital colposcope? A portable design still depends on a suitable power and viewing setup, while image quality depends on positioning, focus, and illumination. An unclear or incomplete image can limit review, so assess the live view before documenting it.
Use this sequence to assess design fit:
- Match intended use: Confirm that the device’s stated purpose fits the planned examination.
- Review the setup: Account for USB power and the connected computing device.
- Assess the view: Consider white or green illumination and available zoom levels.
- Plan device care: Apply the manufacturer’s instructions and clinical procedures.
For teams evaluating equipment for cervical imaging, explore colposcope equipment as part of the clinical setup.
That measurement may help teams consider handling and placement, but it does not establish suitability for a particular examination on its own. Intended use, image workflow, power arrangement, and care requirements also matter when deciding whether the device fits clinical practice.
USA Medical and Surgical Supplies: Colposcopes
USA Medical and Surgical Supplies offers colposcopes for clinical teams evaluating equipment for cervical imaging and documentation. Browse the colposcope offering when comparing equipment with your examination needs, image workflow, and intended use.
Use the camera features discussed above to define your requirements. Consider how the device will support magnified viewing, image capture, and clinical review. These criteria connect equipment selection to the work the colposcope needs to support, rather than portability alone.
USA Medical and Surgical Supplies also offers Blood Pressure Devices, Dopplers, and ECG Machines for other diagnostic equipment needs. For information about colposcopes, contact USA Medical and Surgical Supplies.
Plan your next equipment step
Before selecting a portable colposcope with digital camera, relate the equipment’s intended use to your clinical workflow. Consider how your team will position the device, review images, and incorporate documentation into examination records. This assessment helps clarify which features matter most for your setting.
USA Medical and Surgical Supplies offers colposcopes alongside Blood Pressure Devices, Dopplers, and ECG Machines. These products meet different diagnostic equipment needs, so focus your inquiry on the equipment relevant to your clinical work. Share the type of colposcope you’re considering and the imaging workflow you need to support.
Contact USA Medical and Surgical Supplies to discuss colposcope equipment for your needs. A clear plan can help your team move forward with confidence.
Frequently Asked Questions
What are the regulatory approvals?
Regulatory status depends on the exact device and its intended use; the phrase “portable colposcope” alone does not establish approval. For a particular unit, identify its manufacturer and model, then review its labeling and applicable U.S. regulatory documentation. Keep regulatory status separate from camera features: magnification, image capture, and digital storage do not by themselves demonstrate clearance or approval.
What is the device used for?
A colposcope magnifies tissues of the vagina, cervix, and external genitalia to help clinicians assess abnormalities and identify possible biopsy areas. For example, a captured view can document the location of an area examined during a clinical visit. The device supports examination and documentation; clinicians interpret its images alongside other relevant clinical information, rather than treating an image as a diagnosis.
What is a portable colposcope with a digital camera?
A portable digital colposcope is designed for portable use and uses a digital camera to capture magnified tissue views. In a documented design, the device connects by USB to a computing device for operation and image viewing. Portability describes the equipment setup; it does not mean every model has the same camera, power source, image-transfer options, or intended use.
How do portable digital colposcopes compare in magnification, resolution, and illumination?
These features describe different aspects of imaging. Optical magnification of 20-30 times is a recommended range, while about 2 million pixels is a recommended camera resolution. A documented configuration uses white and green illumination. Compare each specification separately: magnification enlarges the view, resolution affects recorded image detail, and illumination provides light for viewing tissue.
Which portable colposcopes are FDA cleared or approved in the United States?
The portable-colposcope category alone does not establish clearance or approval. Use the exact manufacturer and model to identify the device’s regulatory documentation and stated intended use. Do not infer status from a product description, digital camera, or imaging features. Clinical purpose and technical capability describe what a device does; regulatory status is a separate question.
How do you set up and use a portable digital colposcope?
Follow the manufacturer’s instructions for the specific model. In a USB-powered setup, connect the device to its computing device, position it for the examination, and use the available illumination and focus controls to obtain a clear view. Capture and review images using the device’s workflow, then handle and store them according to the clinical setting’s procedures and patient-record practices.