
Otoscope Buying Guide: Choose the Right Clinical Device in 2026
10/19/2026 05:16:58
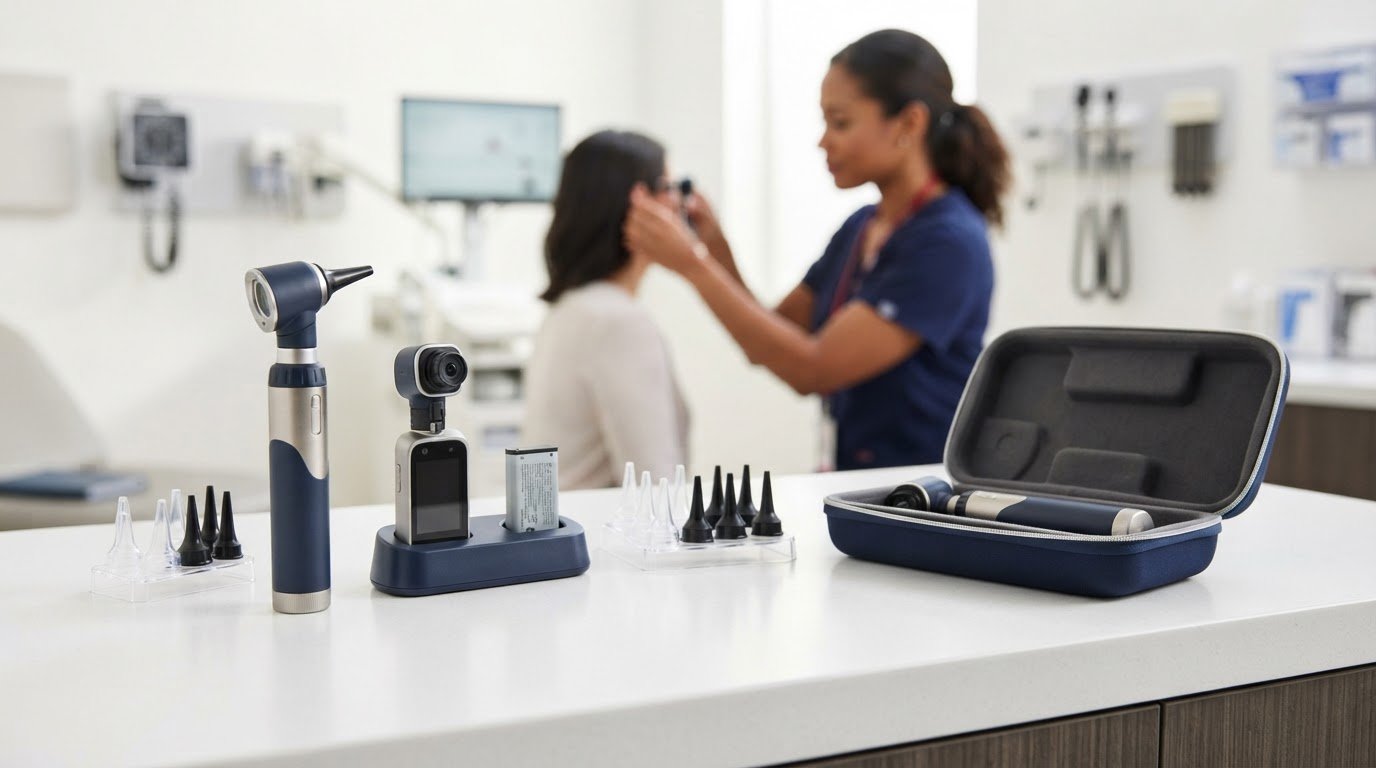
The otoscope with the longest feature list isn’t necessarily the right choice. The best fit depends on how often you’ll use it, where examinations take place, and whether you need a direct view or a digital image. Product listings can be hard to compare when illumination, viewing design, power, and included accessories vary.
If you’re choosing an otoscope for a clinic, a mobile setting, or occasional use, start with practical fit rather than headline features. This guide explains how common otoscope formats differ and what to compare in the viewing system, light source, power, specula, handle, and compatibility details.
You’ll also learn how to match those features to your examination workflow and frequency of use. The goal is a clear purchase decision based on day-to-day requirements, not on a long feature list alone.
Key Takeaways
- Start with the examination setting and frequency of use to narrow down the right otoscope format.
- Compare illumination and viewing designs based on the examination workflow, rather than assuming one option suits every use.
- Review power, handling, storage, and compatibility with your existing equipment before buying.
- Use a practical checklist to compare specifications and included accessories across options.
- Browse the otoscope category to compare devices against your clinical workflow and purchasing needs.
What Is an Otoscope? Understand Its Role in an Ear Examination
Start with the buying decision: match the instrument to the examinations you perform, the setting where you work, and how often the device will be used. A tool kept in a primary-care room for routine visits may have different handling and storage priorities from one carried between locations for occasional examinations. Defining the use case first makes product comparisons more relevant.
An otoscope is an illuminated instrument used to view the ear canal and tympanic membrane during an ear examination. Its light source and viewing head help the clinician direct a view into the ear. For an overview of the instrument and its components, see What Is an Otoscope?.
The instrument supports visual examination; it does not make a diagnosis on its own. What the clinician sees must be considered alongside the patient’s symptoms, history, and other relevant findings. The same distinction matters when comparing diagnostic tools: an ophthalmoscope is designed to examine the eye, while an otoscope is used to view structures in the ear. Each serves a different examination purpose.
What does an otoscope help a clinician examine?
Illumination makes the ear canal easier to visualize, while the viewing head provides a path for looking into it. During an examination, the clinician may assess visible features of the canal and tympanic membrane. The view depends on the examination and the instrument’s design, so an otoscope is one part of the clinical process, not a tool that confirms a condition by itself.
This role can guide a purchase. Consider who will use the device, how it fits into the examination routine, and whether its viewing arrangement suits that workflow. A model’s name alone won’t tell you what view it provides or whether its format is practical for the intended setting. Compare the stated specifications and accessories to see how the options differ.
Who may need an otoscope in a clinical setting?
Clinicians in outpatient and primary-care settings may use an otoscope as part of ear examinations during patient visits. Other clinical environments may also include ear examinations in their workflow. For routine use in one examination room, convenient access and a suitable storage spot may matter most. For occasional or mobile use, portability and how the device is carried may be more important.
Frequency is a useful starting point, not a complete selection rule. For regular use, consider how the instrument will be accessed and handled throughout the workday. For less frequent examinations, compact storage or ease of transport may take priority. In either case, define the examination need and setting before comparing formats. This keeps the decision focused on the intended workflow rather than features that won’t affect it.
Otoscope Features Explained: Illumination, Viewing, and Power
Feature labels are a useful starting point, but they don’t tell the whole story. Compare how a device produces and directs light, what its viewing system specifies, and how it’s powered. These details affect handling and fit with your workflow. For a visual reference to the examination itself, MedlinePlus describes an otoscope examination.
How do LED, fiber-optic, and direct illumination differ?
These terms describe different aspects of illumination. LED identifies a type of light source. Fiber-optic describes a method of carrying light through the instrument toward the examination area. Direct illumination generally refers to light directed from a source positioned in the viewing head. A device may use a particular source with a particular light-delivery design, so read the product description for both.
- LED: Names the light source. Check the device specifications for details such as brightness and color rendering.
- Fiber-optic: Describes light delivery through optical fibers. The term alone doesn’t specify the light source or the view produced.
- Direct illumination: Describes light directed from the instrument head. Product specifications provide the relevant details about the source and viewing arrangement.
Brightness, color appearance, and visibility depend on the complete device, not just one label. Compare the illumination details stated for each product, and don’t assume a technology name guarantees a particular examination experience.
Which viewing and power details should buyers compare?
Look for the viewing aperture, any stated magnification, and descriptions of the field of view. These specifications help you compare the viewing arrangements offered, but a label alone doesn’t establish which option is best for every examination. Check whether the product details describe the view you need and whether any viewing accessories are included.
Separate included accessories from compatibility assumptions. A product may come with certain components, while other accessories may be sold separately or designed for particular devices. Don’t assume that a speculum, handle, or viewing accessory will fit just because it looks similar. Compare the stated specifications to confirm what comes with the device and which components are compatible.
Power details also vary. Check whether the listing describes a handle, batteries, or charging, and note any stated battery type or charging requirements. If you plan to use an existing handle or equipment, compare the exact compatibility information instead of relying on appearance or brand familiarity. The right choice is the one whose viewing, illumination, and power details align with the intended workflow.
Once you know which specifications matter, browse otoscopes to compare options and their stated features.
Which Otoscope Type Fits Your Practice? Compare Formats and Use Cases
Format affects where an instrument is kept, how it is carried, and how it fits into the examination routine. A compact model may be convenient for mobile work or limited storage, while a larger setup may be practical in a fixed examination room. Neither format is automatically the better choice. Start with where the device will be used and how often, then compare its stated features and accessories.
Pocket or full-size otoscope: what changes for daily use?
Pocket formats emphasize portability. Their smaller size can suit clinicians moving between rooms or locations, or practices that need to store equipment in a compact space. Consider how the instrument will be carried and stored, and whether its stated power and handling details fit the routine.
Full-size formats may make sense when the instrument is primarily used in a designated examination room. A fixed location can make storage and access simpler, and the device won’t need to be carried as often. Compare the model’s dimensions, handle arrangement, and included components rather than assuming every full-size device has the same configuration.
Frequency matters, too. For repeated use in one room, buyers may prioritize consistent access and convenient storage. For occasional or mobile use, compactness and ease of transport may matter more. These are comparison points, not guarantees of performance. For a deeper discussion of diagnostic equipment formats, see this ophthalmoscope buying guide.
When should you consider an otoscope-ophthalmoscope set?
A combination diagnostic set brings an otoscope and an ophthalmoscope into one purchasing decision. Consider comparing a set when a practice needs both instruments and wants to plan for them together. If the workflow requires only ear examinations, a set with an additional instrument may not match the immediate need.
Look closely at the exact set contents. Some sets may be designed around a shared handle or storage arrangement, but those details vary by product. Confirm them in the specifications rather than treating them as standard features. Also consider where the instruments will be stored, who will use them, and whether the included components suit the room or mobile workflow.
- Choose compactness as a priority if the device needs to travel or fit limited storage.
- Consider a full-size format if it will remain in a designated examination space.
- Compare a combination set when both diagnostic instruments are relevant to the practice’s equipment needs.
Use format as a practical filter, then compare specific specifications before selecting a device. This keeps portability, routine access, and storage needs in view without assuming a product label alone determines fit.
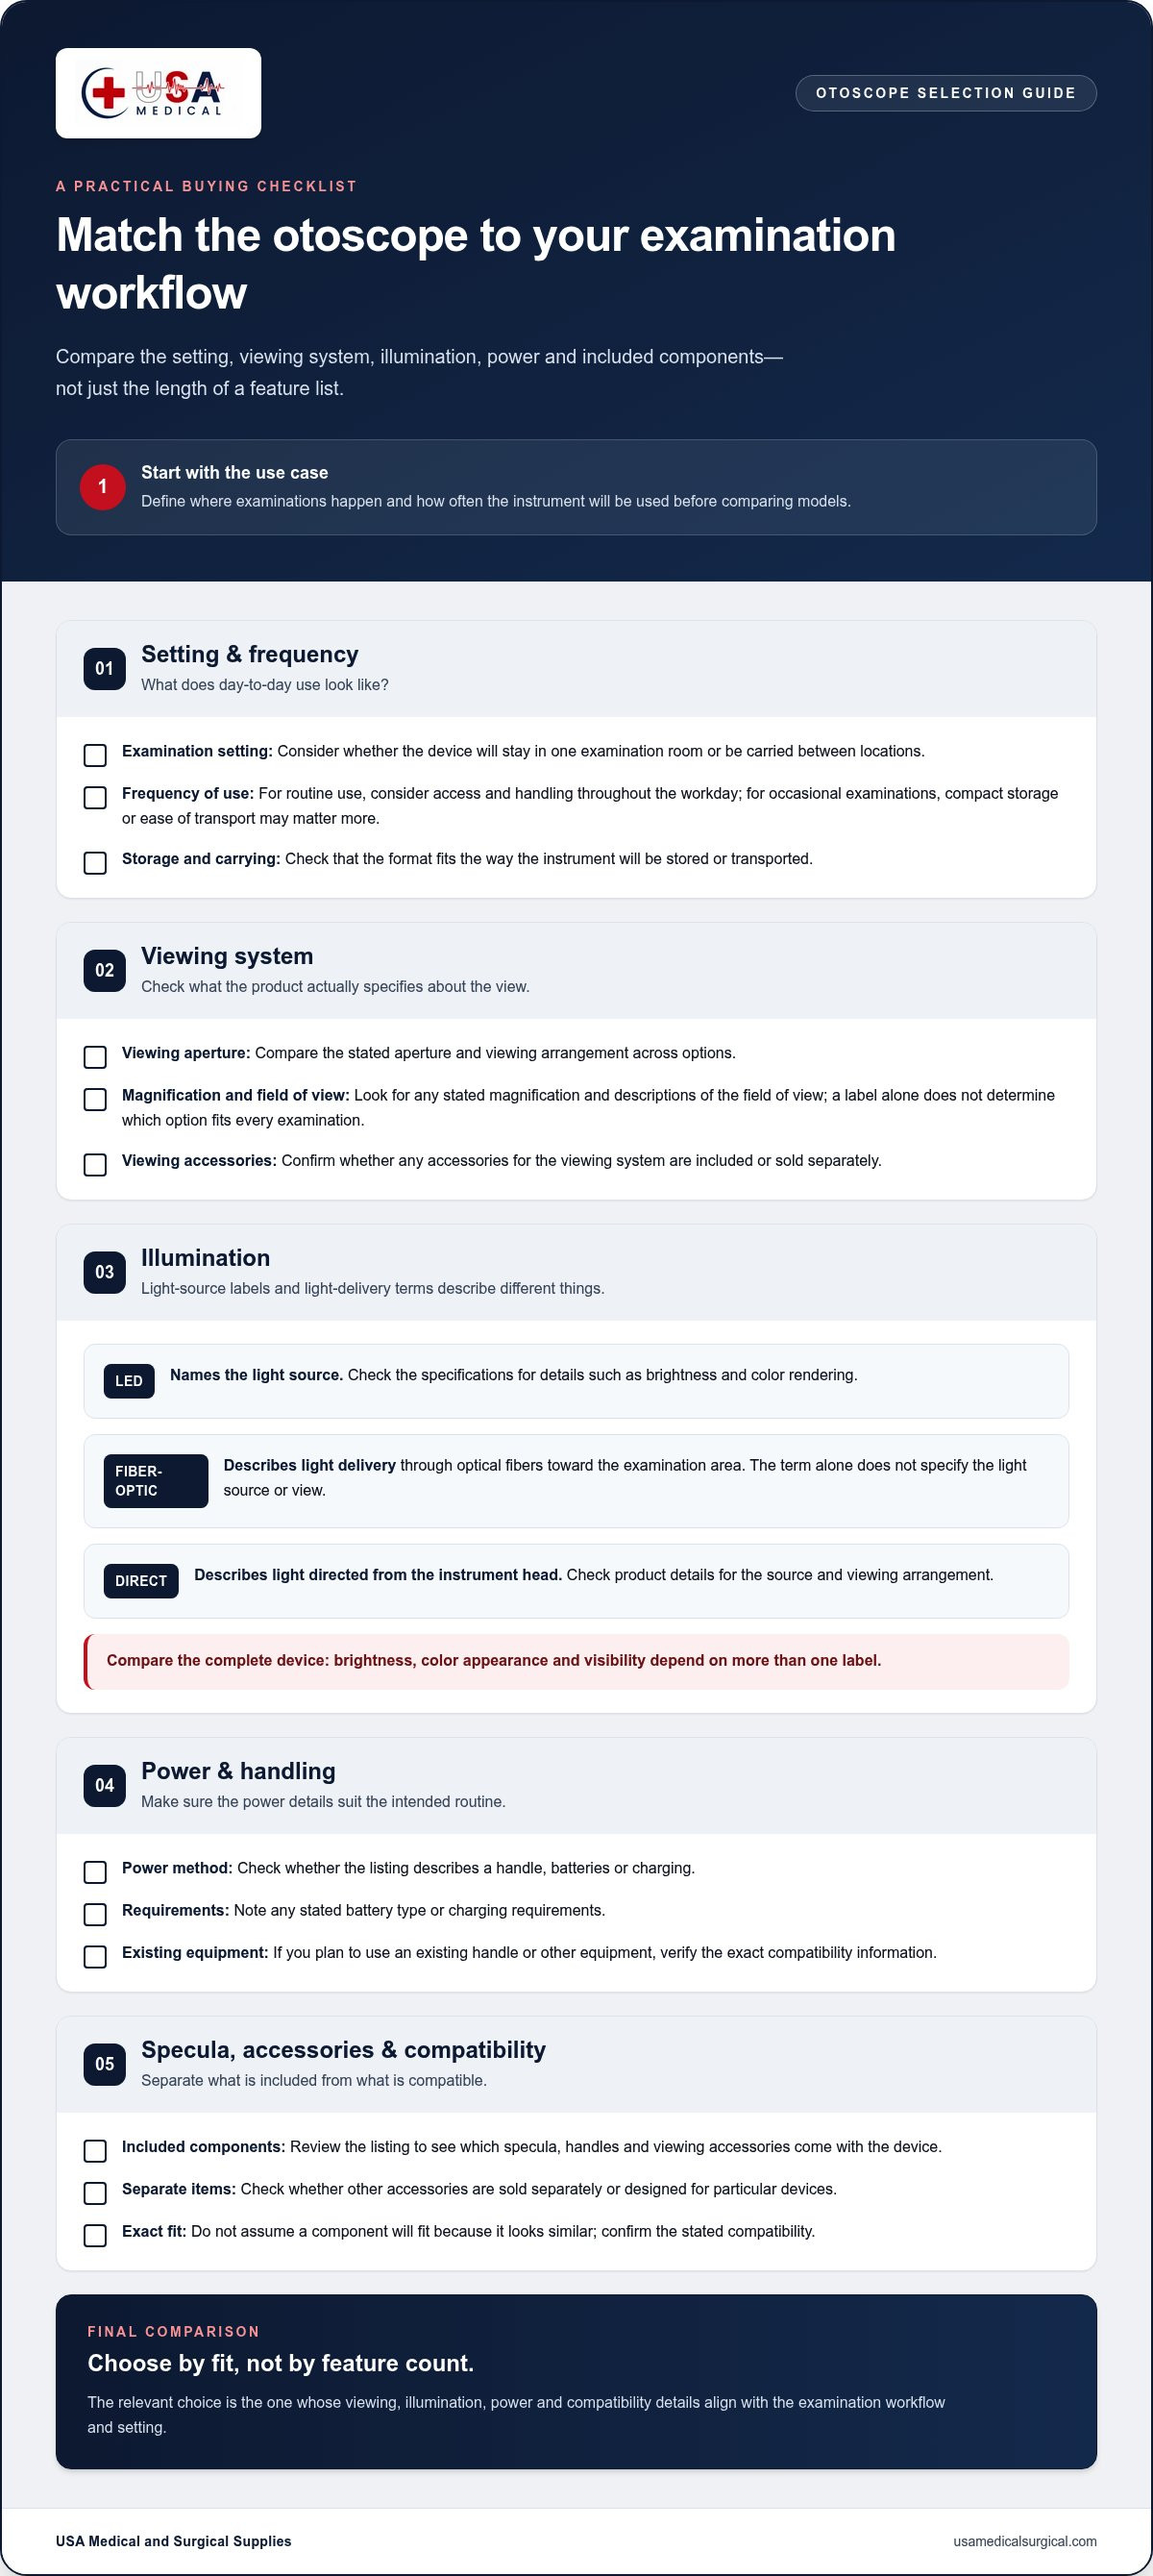
Otoscope Buying Checklist: Match Specifications to Your Workflow
A structured comparison helps separate essential requirements from features that may not affect daily use. Define how the device will be used first, then review its specifications, compatibility, and care requirements before ordering.
What should a practice define before comparing otoscopes?
Start with the user and setting. Decide whether the device will stay in one examination room, be shared across rooms, or travel with a clinician. Estimate how often it will be used and note preferences for viewing, illumination, handling, or storage. These details give you a practical basis for comparing product listings.
- Set the use context: Identify who will use the device, where examinations take place, how mobile the workflow is, and how frequently it will be used.
- Choose the format: Decide whether a portable device, shared equipment, or a fixed-room setup best fits the space and routine.
- Compare illumination: Review the stated light source and light-delivery design. Compare brightness or color-rendering details where the product description provides them.
- Define viewing preferences: Look for details such as viewing aperture, magnification, and field of view, along with any listed viewing accessories.
- Review power and handling: Check the stated handle configuration and whether the device uses batteries or charging. Note any requirements that affect how it will be used.
- Plan storage and access: Decide where the instrument and its components will be kept, especially if equipment is shared or moved between locations.
How can buyers check compatibility and ongoing requirements?
Read each product description for included items and compatibility information. Match the required specula and accessories to the stated device specifications rather than assuming components will fit based on appearance or brand. Review power requirements, replacement components, and care instructions that may affect routine use.
Plan for upkeep before purchase. Follow the manufacturer’s cleaning and maintenance instructions, along with your facility’s applicable protocols. This helps staff understand how the device should be cared for and which procedures to follow between uses. Avoid relying on generalized care advice when the product instructions specify how its materials or components should be handled.
Quick checklist: Define the setting, mobility, and frequency of use; compare illumination and viewing; review power and handling; verify compatibility and included accessories; and check storage and care requirements.
With those criteria in hand, compare product descriptions against your practice’s needs. Browse otoscopes and compare available specifications as you narrow your selection.
Choose an Otoscope and Complete Your Clinical Equipment Purchase
The final choice should reflect how the device will be used, not just how its listing is titled. Bring together the priorities you identified: examination setting, frequency of use, illumination, viewing preferences, format, power, compatibility, and upkeep. A fixed outpatient room, for example, may call for different storage and portability considerations from a clinician’s mobile workflow.
How to narrow the shortlist to a practical option
First remove options that don’t meet essential requirements. Set aside devices whose format, power arrangement, or stated accessory compatibility doesn’t fit the practice. Then compare the remaining specifications against the examination workflow: which viewing details matter, how the instrument will be handled, and what care instructions staff can follow. This keeps the shortlist tied to actual needs instead of a product name or isolated feature.
- Confirm the format: Does it suit the examination location, storage space, and mobility needs?
- Review illumination and viewing: Do the stated details match the preferences identified for the workflow?
- Check power and compatibility: Are the listed power requirements and compatible accessories practical for the intended use?
- Compare included items: Does the product description state that the required components are included?
- Account for upkeep: Can the practice follow the manufacturer’s care instructions and facility protocols?
Compare specifications in the product details rather than assuming similar names indicate the same configuration. Two listings may use familiar format or illumination terms yet differ in included accessories, power requirements, or compatibility. Use the written details to make a like-for-like comparison, and keep the practice’s requirements in view when making the final selection.
Where to browse otoscopes for clinical use
Once the shortlist reflects your requirements, review the otoscope category and available product details. Compare listed features and included components to determine which options align with the intended clinical use. Online ordering lets you complete the equipment purchase through the company website, so you can base the decision on product details rather than the name alone.
Keep the final decision straightforward: match the device’s stated specifications to the setting, workflow, and care plan. Browse otoscopes to review available options and product details.
Make Your Otoscope Purchase with Confidence
Before placing an order, turn your selection criteria into a short purchasing note. Record the intended setting, the features staff rely on, and any required accessories or care considerations. This gives colleagues a shared reference if they’ll use the device together and helps keep the purchase tied to the practice’s needs.
Then compare the final options using their stated specifications, not just product names. A clear decision can also make future equipment reviews more consistent. USA Medical and Surgical Supplies offers otoscopes in a dedicated product category for online browsing and ordering across the United States.
Ready to move from comparison to selection? Browse otoscopes and review the available product details. Choose the option that fits your clinical workflow.
Frequently Asked Questions
Can an otoscope diagnose an ear infection?
No. An otoscope can help a clinician examine visible ear structures, but the instrument alone doesn’t diagnose an infection. The clinician interprets what they see alongside symptoms, medical history, and other examination findings. For example, ear discomfort by itself doesn’t establish the cause, and a view through the instrument must be assessed in context. Use the device as an examination aid, not as a substitute for clinical judgment.
Are otoscope specula universal?
No. Specula aren’t automatically interchangeable across every device. Their fit can depend on the instrument’s design and the specifications provided for that model. Before ordering replacements or accessories, compare the product’s stated compatibility and the speculum type and size required for your setup. Also distinguish single-use items from reusable ones, and follow the manufacturer’s directions for handling and use. A similar appearance isn’t enough to establish a proper fit.
How should an otoscope be cleaned between examinations?
Follow the manufacturer’s cleaning instructions and your facility’s infection-control protocols. The appropriate method can differ for the instrument and its removable components. For example, instructions may specify separate handling for a reusable viewing component and a single-use speculum. Don’t assume the whole device can be immersed or exposed to a particular cleaning agent. Check the device directions for approved products, contact time, and any precautions for electrical or optical parts.
Can an otoscope connect to a smartphone or computer?
Some digital or video models may offer a connection, but it isn’t a feature to assume across all otoscopes. Check the product specifications for supported devices, connection method, and any stated software requirements. A listing should also clarify whether images or video can be viewed or saved through that setup. For instance, a phone connection may suit image review, while a clinic computer workflow may require a different connection type.
What is the difference between an otoscope and an ophthalmoscope?
An otoscope is used to examine the ear, while an ophthalmoscope is used to examine structures inside the eye. They serve different clinical purposes and aren’t interchangeable, even if both are part of a diagnostic equipment setup. A practice deciding whether to purchase one or both can start by identifying which examinations its clinicians perform, then compare each instrument’s stated features and included components.
When should an otoscope bulb or light source be replaced?
Replace a bulb or light source according to the device manufacturer’s instructions, especially if illumination becomes dim, flickers, or stops working. First consult the product guidance, since replacement procedures and compatible components vary by model. Some devices may use a replaceable bulb, while others may have a different light-source design. Don’t force a replacement part into the instrument or assume that a bulb for another model will fit.